Articles

Honey & Chamomile Lotion Bars Recipe: Natural Skincare at Home

Article

Honey & Chamomile Lotion Bars Recipe: Natural Skincare at Home

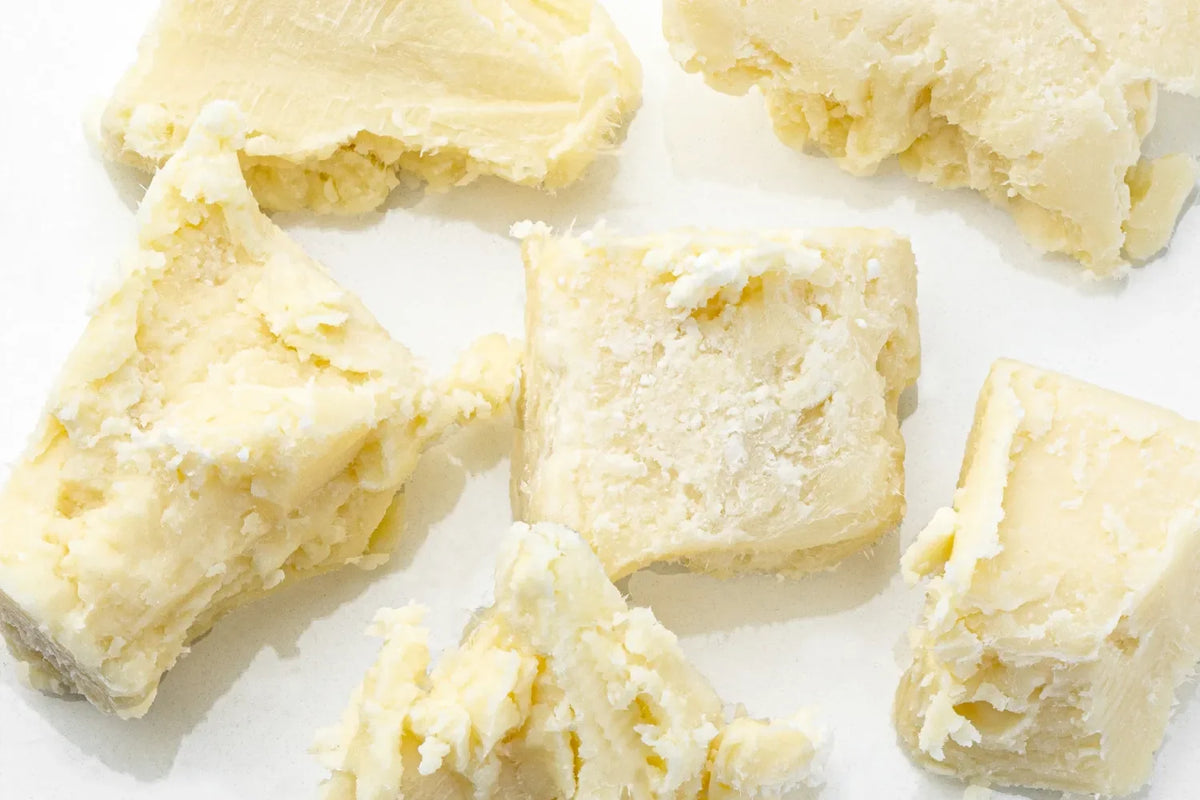
Indulge in creating homemade lotion bars infused with the gentle touch of honey and chamomile. These twist-up lotion bars offer a unique way to moisturize dry and chapped skin, using chamomile's natural soothing properties and honey's sweet aroma. Chamomile, known for its anti-inflammatory and antimicrobial benefits, pairs wonderfully with the included Honey L’Occitane-Type Fragrance Oil, though a natural scent option is available for purists. This guide will take you through making these delightful skincare treats, ideal for your use or as thoughtful gifts. Chamomile-infused apricot kernel oil forms the heart of this recipe, harnessing chamomile's soothing qualities and bisabolol content for your skin's benefit. When paired with honey's sweet fragrance, it creates a nurturing and aromatic skincare experience. This combination is pleasing to the senses and beneficial for the skin, making these lotion bars a must-have in your natural skincare arsenal. TIMINGPrep Time: 15 MinutesPerform Time: 30 MinutesCooking Time: 4 Hours 30 MinutesCooling Time: 25 MinutesTotal Time: 5 Hours 45 Minutes, 40 Minutes active timeSUPPLIESDigital Scale1-2 qt Saucepan or SkilletWire Rack (to fit in saucepan or skillet)Spatula or SpoonSpray bottle with 70% Isopropyl AlcoholFunnel PitcherPipettes (for preservatives and essential oils)Paper towelsFine-mesh sieveFreezerStovetop or Portable BurnerTimerSlow Cooker or Sous Vide Cooker (optional)12 oz Mason Jar with LidSmall Bowl5 x 2 oz Green Twist-Up TubesINGREDIENTSApprox. 1.2 oz / 1.5 cups Chamomile Flowers3.5 oz / 99 g Mango ButterApprox. 8 oz Apricot Kernel Oil3.5 oz / 99 g Beeswax (White)3 g / about 3 ml Honey Fragrance Oil Infuse the Apricot Kernel Oil: Start by infusing chamomile flowers in apricot kernel oil, a process that can be done via slow cooking, sous vide, or natural sunlight. Line the strainer with a paper towel or coffee filter. Strain the oil a second time. Squeeze the paper towel to extract as much oil as possible. Melt the Oils: Melt the beeswax, mango butter, and infused oil, ensuring a smooth blend. Allow the butter and wax to melt, stirring occasionally, for about 25 minutes. Remove from the water bath and allow to cool for 2 minutes. Add the fragrance oil. Stir to combine. Combine and Pour: After adding the fragrance, pour the mixture into twist-up tubes and allow it to set. Place the tubes in the freezer to harden for about 25 minutes. While this recipe features Honey Fragrance Oil for a sweet and complementary aroma, options for a 100% natural scent are also discussed. Lavender or Sweet Orange Essential Oils can replace the fragrance oil, however the amount may need to be adjusted to fit the recipe above. The chamomile's natural scent stands out by adding a different natural fragrance profile. The perfect lotion bar consistency depends on careful melting and accurate ingredient measurements. Suggestions for alternative butters and their effects on the bars’ texture provide flexibility in crafting a product tailored to your preferences. The guide also offers practical advice for molding, ensuring smooth, professionally finished lotion bars. Once your lotion bars are set, they're ready to soothe and moisturize any area of your body that needs extra care. The guide concludes with tips for using and storing your bars to maximize their benefits, ensuring your skin enjoys honey and chamomile's complete soothing and moisturizing properties.
Daisy 1 1/2" Column Silicone Soap Mold Video
Article

Daisy 1 1/2" Column Silicone Soap Mold Video

This video demonstrates how easy it is to use the Daisy 1½" Column Silicone Soap Mold. This robust mold is great for springtime soap making! We love how the daisy looks embedded in a loaf. You can also use the Squiggle Column Silicone Mold to create a stem for the flower.
Simple Secrets: Making Solid Castile Soap

Article

Simple Secrets: Making Solid Castile Soap

What is Castile Soap?True castile soap uses 100% olive oil (plus water and lye) to create a creamy lather in an ultra gentle soap bar. This type of soap is especially popular for people with sensitive skin or those prone to allergic reactions. With so few ingredients, it's tolerated well with almost everyone. Since it is generally marketed for sensitive skin, most castile soaps are also fragrance-free and color-free, but they can be fragranced and colored if you prefer. Here are some tips to help you formulate your own bars of Castile soap.
Marbled & Tie Dyed Swirled Soaps Tutorial

Article

Marbled & Tie Dyed Swirled Soaps Tutorial

Swirled and layered soaps are popular, so we wanted to take a different approach to swirling colors to create visually appealing soaps. With this tutorial you can use a single color to match your fragrance oil choice, or choose multiple colors for a tie dye or holiday theme. The sky's the limit when you have soap colorant bottles in your hand! Supplies and equipment needed:MicrowaveMicrowave safe glass containerSharp knife to cut soap into cubesSpray bottle with rubbing alcoholButter knife for stirring soapRubber glovesDisposable pipettesThermometer to monitor soap base temperatureBasic Rectangle Soap Mold (3 cavities, 3.4 x 2.3 x 1 deep; each cavity holds 4 ounces)White Melt & Pour soap baseBody safe Fragrance OilsVariety of Gel Soap ColorantsStep 1: Cut up approximately 13 ounces of White Melt & Pour soap base into small cubes using a sharp knife.Step 2: Using a microwave safe container, melt the soap base in a microwave using 30 – second bursts until melted. Do not burn or boil, this will result in a poor quality rubbery soap. If there are any small chunks of soap left, stir slowly; the heat of the soap will melt these small chunks. TIP: There are three cavities in this mold and each holds 4 ounces of soap – melt a little extra to take into account that some of the soap base will stick to the container.Step 3: Use a thermometer to monitor the soap temperature. I don't like to add any fragrance oils or additives when the soap is too hot so I wait for it to cool to about 145 degrees.Step 4: Using a disposable pipette, add 6 ml of body safe Fragrance Oil to the soap and stir in slowly.Step 5: Now it's time to add color drops to the soap mold. Add 4 or 5 drops of a variety of different Gel Soap colors to each cavity for a tie dye effect, or use a single color for a marbled effect. I placed random colors into each cavity. TIP: Try to space them evenly apart.Step 6: Working with one mold cavity at a time, pour the scented soap directly onto each dot of color.Note: No need to be gentle when pouring – your goal is to allow the color to spread naturally and if you pour too gently you'll end up with blobs of color.Step 7: You can also spritz with alcohol while pouring your soap. This helps to spread the color.Step 8: Finish pouring all the way to the edge of the mold. Finish off with a spritz of alcohol to remove any bubbles. TIP: If you're not too confident that the colors swirled enough, take a butter knife and insert it into the soap cavity and swirl the knife around a bit. Do this part gently; you don't want to mix the colors.Step 9: Do not move the soap mold until the soap has cooled and set. You'll be able to see the swirls of colors in the soap moving a bit, but the movement will stop as the soap hardens.Step 10: Wait 2-3 hours for the soap to completely harden. Turn the mold over carefully and slowly press on the bottom of the cavity to release each soap.This is a great technique to use with holiday colors – Christmas, Independence Day, Mardi Gras, St. Patrick's Day, Thanksgiving, spring and fall seasons, and Easter. Who needs eggs at Easter when you have these lovelies?! Also, pair single colors with complementing scents for a beautiful looking & smelling soap. Creating tie dye soap is a fun and creative way to add a burst of color to your soap-making projects. Here are some tips to help you achieve stunning marbled tie dye effects using melt and pour soap bases. Choose the Right Soap Base: When making tie dye soap, opt for a clear melt and pour soap base. This allows the vibrant colors to show through more effectively. Glycerin soap bases are a popular choice for their clarity and ease of use. Use Quality Colorants: To achieve vivid and long-lasting colors, use soap colorants that are specifically designed for melt and pour soap. Avoid food coloring, as it can bleed and fade over time. Mica powders and liquid soap dyes work well for making tie dye soap. Layering and Swirling Techniques: For a marbled tie dye effect, pour different colored soap layers into your mold and use a skewer or toothpick to create swirls. Work quickly but carefully to prevent the soap from setting too soon, which can affect the swirling effect. Temperature Control: Melt the soap base slowly over low heat to prevent it from overheating. Overheating can cause the colors to bleed and mix too much, resulting in a muddy appearance. The ideal temperature for pouring is around 120°F to 130°F. Experiment with Fragrances: Enhance your tie dye soap by adding fragrances that complement the colorful design. Essential oils and fragrance oils can be added to the melted soap base before pouring. Make sure the fragrance is well mixed to ensure an even scent throughout the soap. What is the best soap base for making tie dye melt and pour soap?A white glycerin melt and pour soap base is the best choice for making tie dye soap. Its transparency allows the colors to stand out vividly, creating a striking marbled tie dye effect.Can I use food coloring for tie dye soap?It's not recommended to use food coloring for tie dye soap, as it can bleed and fade over time. Instead, use soap colorants like mica powders or liquid soap dyes, which are designed for stability in soap.How do I prevent the colors from mixing too much and becoming muddy?To prevent colors from mixing too much, control the temperature of your melted soap base and pour carefully. Swirl the colors gently and avoid over-mixing. Working quickly and efficiently also helps maintain distinct color patterns.
How Our Fragrance Bottles Are Branded Video

Article

How Our Fragrance Bottles Are Branded Video

Have you noticed new branding on our fragrance oils, essential oils, and flavor oils? This video takes you behind the scenes to show you how the bottles are branded. See the journey of an amber glass bottle going through the process of having the new white and blue shrink-wrap labels being applied. We love this new packaging, and we hope you do too!
Nurturing Hospitality Guests With Aromatherapy
Article

Nurturing Hospitality Guests With Aromatherapy

If you handcraft products for boutique hotels, quaint B&Bs, or relaxing spas, adding well-chosen essential oils to your creations can have a deeply positive effect on the guest. The emotionally balancing, skin benefiting and other positive properties of essential oils can make their visit (and your products) nurturing and memorable.
Shea Butter in Soap: Benefits and How to Use It

Article

Shea Butter in Soap: Benefits and How to Use It

Shea butter in soap: what it does for your skin, how much to use in cold process and melt and pour, and raw vs refined, a maker's guide from WSP.
The Chemistry of DOS

Article

The Chemistry of DOS

Knock, knock. Who’s there? Orange. Orange who? Orange you glad I didn’t title this article “Out, Damned Spot”? I have to admit that I lived most of my life blissfully ignorant of the Dreaded Orange Spots. You never see them on grocery store soaps. And my earliest cold-process soaps, made from lard and Red Devil Lye, were pristine bars of bubbly delight. Yes, life was good then, but it was not to last. Once I started really trying to make nice, fancy, luxurious, complicated soaps, I began to notice blemishes. I swore they had not been there when the bars were cut. I swore that I had not seen them on my early soaps. I swore that they didn’t really matter, because the soap lathered well, and surely nobody would notice a few innocuous orange zits. I just plain swore.
A Guide To Transparent Soaps

Article

A Guide To Transparent Soaps

In 1807, Andrew Pears introduced a new kind of soap onto the market. Traditionally, soap was made by boiling fats and oil with dilute lye. The boiling mixture separated into two layers, the soap floating to the top, and the spent lye settling to the bottom. The soap was skimmed off the top and pressed into bars, while the lye was run to waste. When Pears introduced alcohol into the process, the boiling mixture no longer separated into layers. The soap, spent lye and alcohol remained mixed, and when the mixture cooled, it solidified into translucent soap. The new soap was an instant hit.
Fragrance Oils – Frequently Asked Questions

Article

Fragrance Oils – Frequently Asked Questions

This article answers commonly asked questions on what Fragrance Oils are and how they are used.
Protecting Confidential Information

Article

Protecting Confidential Information

There are ways to limit who knows the secrets of your trade that do not require obtaining expensive patents, trademarks, and copyrights granted by the government. Protect the information that makes your company unique by following some of these tips for your most confidential information.
Guidelines For Formulating With Herbs & Spices

Article

Guidelines For Formulating With Herbs & Spices

Natural ingredients are in high demand in cosmetic formulations. As food science plays a big part in cosmetic formulation, it makes sense that food products are making a splash in cosmetics. Because of this trend, we are seeing a surge of herbal plant additives and spices in skincare products.