Help & How Tos

How To Use Washing Soda (Sodium Carbonate)

Article

How To Use Washing Soda (Sodium Carbonate)
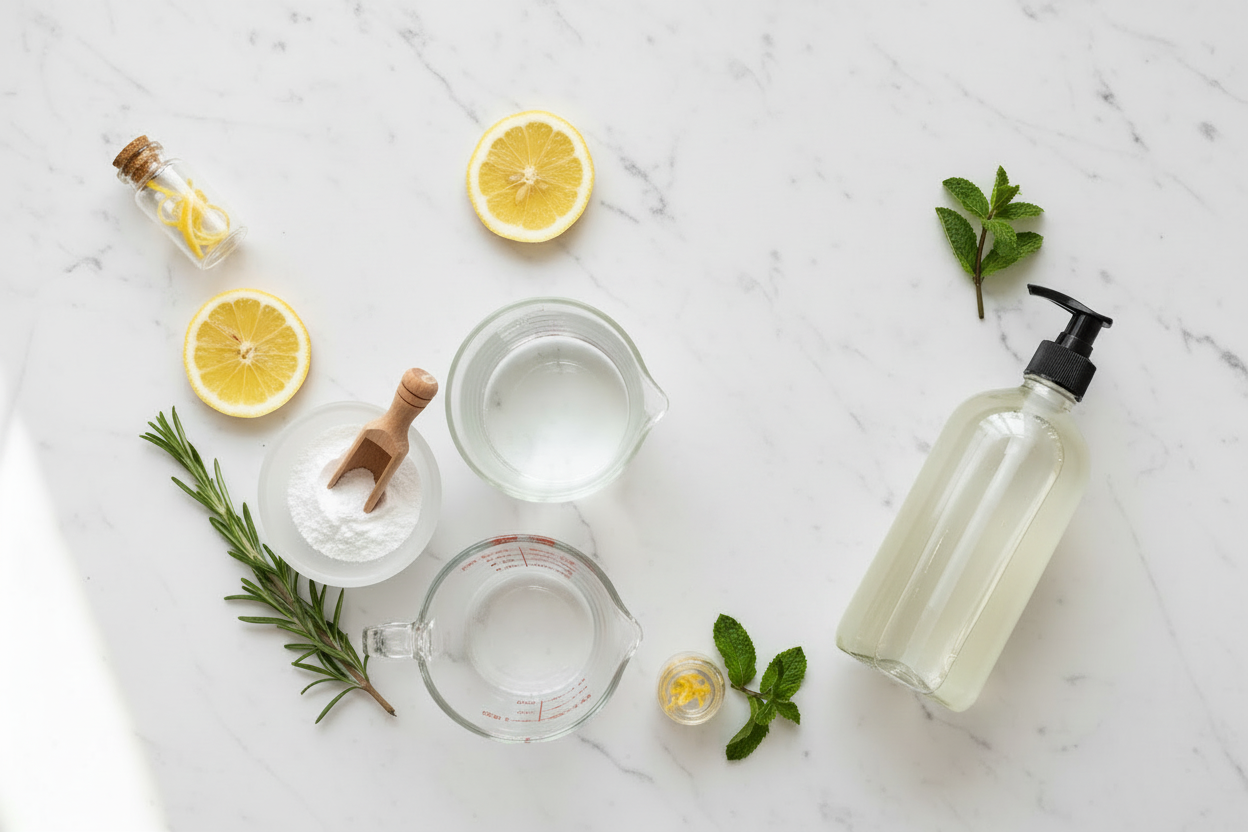
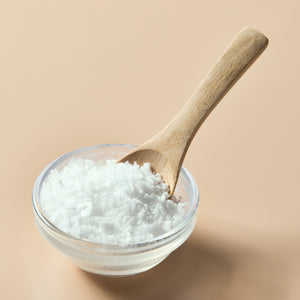
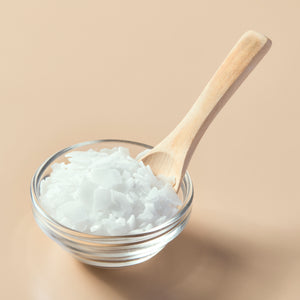
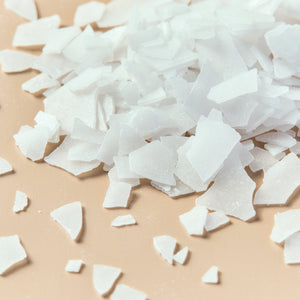
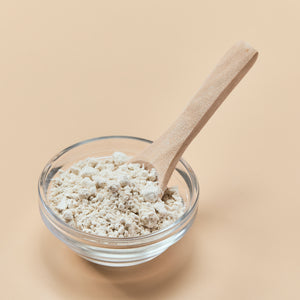
Washing soda, scientifically known as sodium carbonate, is a powerful and natural ingredient valued for its effective cleaning and stain-fighting properties. From boosting laundry detergent to creating homemade cleaning solutions, sodium carbonate washing soda is a staple for DIY enthusiasts and small businesses aiming to offer eco-friendly, high-performing cleaning products. This guide will explain what sodium carbonate is, its uses, and how to safely incorporate it into various applications. Sodium carbonate, commonly called washing soda, is a naturally occurring mineral compound composed of sodium, carbon, and oxygen. It's widely used as a water softener and pH adjuster in both household and industrial applications. Known for its powerful grease- and stain-cutting abilities, washing soda is frequently used as a laundry booster and household cleaner. While chemically related to baking soda, sodium carbonate is far more alkaline, making it an effective, heavy-duty cleaning agent. Laundry BoosterUsing washing soda for laundry is a great way to enhance detergent effectiveness. Sodium carbonate acts as a water softener, which helps detergents dissolve and work more efficiently, especially in hard water areas. Adding 1/2 cup of washing soda to your laundry load can help remove tough stains, odors, and residues that regular detergents might leave behind. Stain RemoverFor stubborn stains like grease, ink, or grass, washing soda can be used as a pre-treatment. Mix 2 tablespoons of sodium carbonate with a gallon of warm water and soak stained clothes for 30 minutes before washing. This powerful pre-soak is particularly effective for heavily soiled items or whites that need an extra boost. Homemade Cleaning SolutionsSodium carbonate washing soda is a key ingredient in many homemade all-purpose cleaners. Its high alkalinity makes it excellent for cutting through grease and grime on kitchen counters, stovetops, and even bathroom surfaces. To create a versatile cleaner, mix 1/4 cup of washing soda with 1 quart of warm water, and use it to wipe down surfaces. Avoid using on delicate surfaces like aluminum or painted surfaces, as the high alkalinity may cause damage. Carpet and Upholstery CleanerWashing soda can help refresh carpets and upholstery by neutralizing odors and lifting dirt. For a quick carpet deodorizer, sprinkle a small amount of washing soda onto the carpet, let it sit for 10–15 minutes, and then vacuum thoroughly. For deeper cleaning, dissolve washing soda in water and apply it to upholstery stains, then blot with a clean cloth. Dishwashing AidSodium carbonate can be used to boost dishwashing performance by helping to remove hard water deposits and grime. Simply add a small amount of washing soda to your dishwasher's detergent compartment (about 1-2 tablespoons) alongside regular detergent to improve results. Note that washing soda is not safe for use on aluminum or fine glassware. Use Gloves: Washing soda is highly alkaline, so it's best to wear gloves when handling it to avoid skin irritation. Avoid Certain Surfaces: Because of its abrasiveness, avoid using washing soda on aluminum, delicate metals, or painted surfaces to prevent potential damage. Store Properly: Store sodium carbonate in a sealed container in a cool, dry place, as it can absorb moisture and clump if left open. Can I use washing soda in any type of laundry machine?Yes, washing soda is safe for both top-loading and front-loading washing machines. Just make sure to add it directly to the drum with your laundry or to the detergent compartment.How is washing soda different from baking soda?While both are derived from sodium, washing soda is more alkaline than baking soda, giving it stronger cleaning power. Baking soda is a milder cleaner suited for everyday deodorizing, whereas washing soda is better for heavy-duty cleaning.Is washing soda safe for septic systems?Yes, washing soda is generally safe for septic systems when used in moderate amounts, as it breaks down naturally and won't harm the bacterial balance in your system. Sodium carbonate, or washing soda, is an incredibly versatile and powerful cleaning agent that has earned its place as a staple in many homes and businesses. From laundry boosting to homemade cleaners, washing soda offers an effective and eco-friendly solution for tackling tough stains, grime, and odors. With its simple composition and multiple applications, washing soda is a valuable addition to any DIY or small-business cleaning toolkit.
Learn to Make: Lotion Bars

Article

Learn to Make: Lotion Bars
Lotion bars are a decadent mix of butters, oils, wax and other nourishing additives. The moisturizing ingredients help protect and condition the skin from outside elements. Lotion bars contain all of the goodies that lotion contains, except for water or water-based ingredients. Because no water is used, a preservative is not needed. 
How to Naturally Color Soap

Article

How to Naturally Color Soap
Consumers are more conscience of what they buy, and increasingly educated on ingredients. Questions such as ‘Is this natural?’ and ‘What is this ingredient?’ are becoming much more commonplace. It’s only natural that many soapers are moving to more natural products. So the question comes, how do I naturally color soap? This article will touch on some issues, and go into some detail on coloring soap naturally.
Chelating Shampoo Recipe: A Deep Cleanse for Healthier Hair

Article

Chelating Shampoo Recipe: A Deep Cleanse for Healthier Hair
If you’re dealing with hard water buildup or dull, lifeless hair, a chelating shampoo can be a game changer. Designed to remove mineral deposits, chlorine, and product residue, chelating shampoos provide a deep cleanse that restores your hair’s natural health and shine. While commercial options are available, making your own DIY chelating shampoo allows you to customize the ingredients and enjoy a natural solution for healthier hair. In this guide, we’ll explore how chelating shampoos work, their benefits, and a step-by-step recipe to create your own. Chelating shampoos are specially formulated to target and remove mineral buildup caused by hard water, chlorine, and environmental pollutants. These shampoos contain ingredients known as chelating agents, such as disodium EDTA, tetrasodium EDTA, and sodium phytate, which bind to mineral ions and help wash them away during rinsing. This deep-cleansing action allows your hair to absorb moisture and nutrients more effectively, leaving it softer, smoother, and more manageable.Unlike regular shampoos that focus on cleansing dirt and oil, chelating shampoos go a step further by breaking down stubborn residues that can weigh hair down or cause discoloration, especially in color-treated or blonde hair. Incorporating a chelating shampoo into your hair care routine can offer several benefits: Removes Hard Water Buildup: Chelating shampoos are particularly beneficial for those who live in areas with hard water. They help remove mineral deposits like calcium and magnesium that can cause dryness and brittleness. Restores Shine and Softness: By eliminating buildup, chelating shampoos reveal your hair’s natural shine and softness. Prepares Hair for Treatments: A deep cleanse from a chelating shampoo creates a clean slate, making it easier for treatments like deep conditioners or color applications to penetrate effectively. Neutralizes Chlorine: Chelating shampoos are great for swimmers, as they remove chlorine that can damage and discolor hair. Improves Scalp Health: Removing buildup from the scalp promotes better circulation and reduces flakiness, irritation, and itchiness. Making your own chelate-rich shampoo requires a few essential ingredients. Each ingredient plays a role in providing a deep cleanse while maintaining hair health: Sodium Phytate: A natural chelating agent derived from plant-based sources, sodium phytate binds to metal ions, making them easier to rinse away. Tetrasodium EDTA: A powerful chelating agent often used in commercial shampoos to remove mineral buildup and chlorine. Disodium EDTA: A milder chelating agent that complements tetrasodium EDTA in breaking down residues. Ascorbic Acid (Vitamin C): Known for its antioxidant properties, ascorbic acid neutralizes chlorine and helps maintain scalp health. Liquid Castile Soap: Serves as the base for your shampoo, offering gentle cleansing without harsh sulfates. Aloe Vera Gel: Adds moisture and soothes the scalp. Essential Oils (Optional): For fragrance and added benefits, use oils like tea tree (clarifying), lavender (soothing), or peppermint (stimulating). Gather the following tools to make your DIY chelating shampoo: Mixing Bowls: For combining dry and liquid ingredients. Whisk or Spoon: To ensure ingredients are evenly blended. Funnel: Helps pour the shampoo into bottles without spilling. Storage Bottles: Use airtight, BPA-free bottles to store your finished shampoo. Follow these steps to create your own chelating shampoo: Prepare the Base: In a mixing bowl, combine 1 cup of liquid Castile soap with ¼ cup of aloe vera gel. Stir gently to avoid creating bubbles. Add Chelating Agents: Stir in 1 teaspoon of sodium phytate, ½ teaspoon of tetrasodium EDTA, and ½ teaspoon of disodium EDTA. Mix well until fully dissolved. Incorporate Ascorbic Acid: Add 1 teaspoon of ascorbic acid to the mixture. This helps neutralize chlorine and provides additional detoxifying properties. Customize with Essential Oils: If desired, add 10-15 drops of your favorite essential oils. For example, tea tree oil helps with scalp issues, while lavender oil adds a calming scent. Mix Thoroughly: Whisk the mixture until all ingredients are fully combined and smooth. Transfer to Bottles: Use a funnel to pour the shampoo into your storage bottles. Seal tightly and store in a cool, dry place. To maximize the benefits of your DIY chelating shampoo, follow these tips: Use Sparingly: Chelating shampoos are designed for occasional use, typically once every 1-2 weeks, to prevent over-cleansing or drying out your hair. Apply to Wet Hair: Wet your hair thoroughly before applying a generous amount of shampoo. Focus on the scalp and work the product through to the ends. Massage Gently: Use your fingertips to massage the shampoo into your scalp for 1-2 minutes. This helps remove buildup and stimulates blood circulation. Rinse Thoroughly: Make sure to rinse your hair completely to remove all residues. Follow with a hydrating conditioner or hair mask to restore moisture. Follow with a Conditioner: Chelating shampoos can be drying, so always use a nourishing conditioner to replenish hydration. Q: Can I use chelating shampoo on color-treated hair?A: Yes, but use it sparingly. Chelating shampoos can help prevent color fading caused by hard water minerals but may strip color if overused. Limit use to once a month for color-treated hair.Q: How is chelating shampoo different from clarifying shampoo?A: While both remove buildup, chelating shampoos specifically target minerals and chlorine from hard water, while clarifying shampoos focus more on removing product residue and oils.Q: What is the role of ascorbic acid in shampoo?A: Ascorbic acid neutralizes chlorine and helps maintain a healthy scalp by providing antioxidant benefits.Q: Can I use a chelating shampoo bar for hard water?A: Yes, chelating shampoo bars can be an eco-friendly alternative, especially if formulated with ingredients like sodium phytate and tetrasodium EDTA for hard water removal.
How to Create a Galaxy Melt and Pour Soap

Article

How to Create a Galaxy Melt and Pour Soap
All things galaxy are increasing in popularity. We’ve seen so many galaxy themed soaps and finally tried our hand at the technique. Here are our tips and tricks for creating a galaxy designed soap using Crafter's Choice Tray 12 Rectangles Silicone Mold 1701.
Autumn Aromatherapy: Essential Oil Blends for Fall DIY Kits

Article

Autumn Aromatherapy: Essential Oil Blends for Fall DIY Kits
As the crisp air of autumn settles in, there’s nothing quite like filling your home with the warm, comforting scents of the season. Whether you’re crafting soaps, candles, or diffusing your favorite aromas, these fall scent blends are perfect for creating a cozy atmosphere. From the sweet and spicy notes of apple cider to the earthy tones of a forest walk, these essential oil blend recipes will bring the essence of fall right into your home. Essential oil blends are carefully crafted combinations of various essential oils and fragrance oils designed to create a specific aroma. These blends can be used in a variety of DIY projects, such as soaps, candles, and diffusers, making them a versatile choice for any fall DIY kit. By combining different oils, you can create complex scents that evoke memories and emotions tied to the season. This makes fall scent blends a must-have for anyone looking to enhance their autumn aromatherapy experience. Capture the essence of a warm cup of apple cider with this delightful blend. Perfect for use in fall diffuser blends or in your next soap-making project, this blend combines sweet, spicy, and fruity notes for a truly comforting aroma.Suggested Ratio: Cinnamon Fragrance Oil: 4 dropsCinnamon Fragrance Oil Clove Bud Essential Oil: 3 dropsClove Bud Essential Oil Orange Sweet Essential Oil: 3 dropsOrange Sweet Essential Oil Ginger Essential Oil: 2 dropsGinger Essential Oil Warm Vanilla Nutmeg Fragrance Oil: 2 dropsWarm Vanilla Nutmeg Fragrance Oil Apple Honey Champagne Fragrance Oil: 3 dropsApple Honey Champagne Fragrance Oil This scent blend recipe brings together the warmth of cinnamon and clove with the sweetness of apple and honey, finishing with a subtle hint of ginger for that authentic apple cider feel. Nothing says autumn like the comforting scent of pumpkin spice. This scent recipe captures the essence of the season with a perfect balance of warm spices and sweet vanilla. Ideal for fall diffuser blends or adding a festive touch to your DIY soap kits.Suggested Ratio: Perfect Pumpkin Essential Oil Blend: 5 dropsPerfect Pumpkin EO/FO Blend Cinnamon Leaf Essential Oil: 3 dropsCinnamon Leaf Essential Oil Clove Bud Essential Oil: 2 dropsClove Bud Essential Oil Warm Vanilla Nutmeg Fragrance Oil: 3 dropsWarm Vanilla Nutmeg Fragrance Oil Vanilla Fragrance Oil: 2 dropsVanilla Fragrance Oil This blend combines the rich scent of pumpkin with the classic spices of cinnamon and clove, all tied together with a sweet vanilla finish. It’s the ultimate fall scent blend for any autumn-themed DIY project. Bring the scent of a crisp fall forest into your home with this earthy and invigorating blend. Perfect for those who love the outdoors, this blend captures the essence of an autumn walk through the woods.Suggested Ratio: Fir Needle Essential Oil: 4 dropsFir Needle Essential Oil Cedarwood Essential Oil: 3 dropsCedarwood Essential Oil Juniper Breeze Fragrance Oil: 2 dropsJuniper Breeze Fragrance Oil Patchouli Fragrance Oil: 2 dropsPatchouli Fragrance Oil This scent blend recipe combines the fresh, woodsy scents of fir needle and cedarwood with the subtle sweetness of juniper and the earthy depth of patchouli. It’s perfect for creating a calming, nature-inspired atmosphere in your home.These fall fragrance blends are perfect for adding seasonal scents to your DIY kits. Whether you're crafting soaps, candles, or simply want to enjoy the aromas of autumn through your diffuser, these essential oil scent recipes will fill your space with the warmth and comfort of the season.
Easy
How to Make Customized Alcohol-Based Cleansing Hand Rub

Article

How to Make Customized Alcohol-Based Cleansing Hand Rub
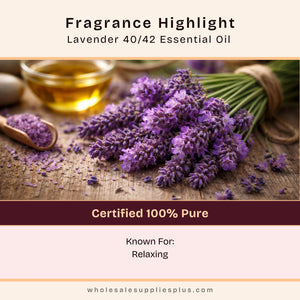
Welcome to the simple and effective world of homemade hand rubs! Our Rinse-Free Alcohol Cleansing Hand Wash is a high-quality, unscented option that provides a quick, rinse-free hand wash solution. This alcohol-based hand rub evaporates in seconds, leaving no residue and ensuring your hands are sanitized without water. For this DIY alcohol hand rub, you will need: Isopropyl Alcohol Essential Oil or Fragrance Oil (optional) Water-Soluble Liquid Colorant (optional) Pro Vitamin B-5 and Vitamin E These ingredients come together to create a rinse-free soap that not only cleanses your hands but also cares for your skin, thanks to moisturizing agents like glycerin and aloe vera. This combination ensures your hand rub doesn't just sanitize but also leaves your hands feeling soft and refreshed. Step 1To begin your DIY process, sanitize all supplies that will come in contact with the Hand Rub Gel Base with isopropyl alcohol to ensure it is safe and effective.Step 2Add the hand-rub gel base to a funnel pitcher or glass measuring cup. To ensure you use every bit of the base, carefully slice the container in half with a utility knife, always cutting away from your body.Step 3Enhance your hand rub by adding 0.25-0.5% Essential Oil or Fragrance Oil for added benefits and aroma. We recommend using Essential Oils like Lavender 40/42 for their natural antibacterial and antifungal properties. Ensure that the concentration is skin-safe and test it in a small amount of base to avoid thinning the gel.Step 4Mix thoroughly to combine all ingredients evenly and achieve a consistent texture.Step 5Finally, use a funnel or funnel pitcher to pour your customized alcohol hand rub into the container of your choice. For smaller openings, such as those in lotion mini containers, a pipette can be helpful. Creating your own alcohol-based hand rub is both a satisfying and practical undertaking. This straightforward 45-minute DIY project not only equips you with a personalized rinse-free hand wash but also serves as an effective tool in your hygiene arsenal to combat germs. Relish the peace of mind that comes from knowing the exact contents of your cleansing hand rub and the confidence in its ability to sanitize effectively.For more hygiene solutions, consider exploring our head cleaning solutions and foaming handsoap collections for a curated disinfecting experience.
Learn to Make: Bath Fizzies

Article

Learn to Make: Bath Fizzies
Bath fizzies are little bundles of fun for the tub. They can be formed into spheres or shapes. When dropped into the tub, they fizz and release the pleasant aroma of scent used. 
How to Make Dry Oil Perfume Spray

Article

How to Make Dry Oil Perfume Spray
A quick and easy way to create a wonderful smelling perfume or cologne that dries quickly and isn't greasy! Using the Artisan's Perfume Base, Cyclomethicone, and Fragrance Oil of your choice, this spray will leave a silky smooth feeling when sprayed directly onto the skin as well as imparting a cooling effect. Because it's inexpensive to make, you can create a variety of scents for different moods, events, time of day, and seasons – or just for the special man in your life! Supplies and Equipment NeededLarge spoon or butter knife for stirringRubber glovesDigital ScaleFunnel Pitcher2 oz PET Bottles with sprayerCyclomethiconeArtisan's Perfume BaseBody safe fragrance oilNOTES/TIPS• Use PET containers with fine mist sprayers. Do not use bottles made with PVC because the fragrance oil will likely break down and degrade the PVC.• You may need to adjust the percentages slightly if the fragrance oil is on the strong side.• Measure all ingredients by weight, not volume.Formulation:90% Cyclomethicone5% Artisan's Perfume Base5% fragrance oil Step 1Using the Funnel Pitcher and scale, weigh out 8 ounces of Cyclomethicone.Step 2Measure by weight .40 ounce of body safe Fragrance Oil and add it to the Cyclomethicone. We used Light Blue type fragrance oil in this recipe. Usage is 5% of fragrance oil to the Cyclomethicone. In this tutorial, 5% of 8 ounces is .40 ounces.Step 3Add 5% of the Artisan's Perfume Base. Weigh out .40 ounce of the Artisan's Perfume Base and add it to the Cyclomethicone. The Artisan's Perfume Base will add a cooling effect to the spray.Step 4Stir slowly until fully incorporated. Cyclomethicone stays completely blended and crystal clear without the need for shaking.Step 5Slowly pour the product into 2-ounce Tapered PET Spray bottles. This tutorial will make four 2-ounce bottles of Dry Oil Spray.Step 6Mix and match fragrance oils to come up with a unique scent. Enjoy! Creating your own dry oil perfume spray can be a luxurious and personalized experience. This type of perfume is light, non-greasy, and leaves your skin feeling silky smooth. Here are some tips to ensure your dry oil perfume spray turns out perfect:Store Properly: Store your dry oil perfume spray in a dark glass bottle to protect it from light and heat, which can degrade the quality of the oils. A spray bottle is convenient for application and helps distribute the perfume evenly on your skin.Blend Fixatives for Longevity: To ensure your fragrance lasts longer on your skin, consider adding a natural fixative like benzoin resin or frankincense. These ingredients help to slow down the evaporation rate of the essential oils, making your scent last longer.Experiment with Layering: Don't be afraid to experiment with layering different scents. Start with a base note, add a middle note, and finish with a top note. This creates a more complex and intriguing fragrance profile.Keep a Perfume Journal: Document your recipes and the amounts used in a journal. This will help you keep track of successful blends and make it easier to replicate or tweak your recipes in the future.Consider Seasonal Scents: Tailor your dry oil perfume to the seasons. Use lighter, fresher scents like citrus and florals in the spring and summer, and warmer, spicier notes like vanilla and cinnamon in the fall and winter. How long does homemade dry oil perfume last?If stored properly in a dark, cool place, homemade dry oil perfume can last for up to a year. The longevity also depends on the shelf life of the carrier oils and essential oils used.How do I apply dry oil perfume spray?Spray the dry oil perfume onto your pulse points, such as your wrists, neck, and behind your ears. These areas generate heat, which helps to diffuse the fragrance throughout the day.What essential oils blend well together for a dry oil perfume?Common blends include lavender and vanilla for a soothing scent, rose and sandalwood for a floral-woody fragrance, or citrus oils like bergamot and grapefruit for a fresh, invigorating perfume.Are there any skin types that should avoid dry oil perfume?Most skin types can use dry oil perfume, but those with very sensitive skin should test the blend on a small area first to ensure there is no irritation. Choose hypoallergenic essential oils if you have sensitive skin.Can I add other ingredients to my dry oil perfume spray?Yes, you can add ingredients like vitamin E oil to extend the shelf life or aloe vera gel for additional skin benefits. Ensure all added ingredients are skin-safe and compatible with the oils.
Simple Secrets: Swirling Melt & Pour Soap

Article

Simple Secrets: Swirling Melt & Pour Soap
The Goal: Swirled soap is not just for cold process soap makers. In this article, we discuss one method for swirling melt and pour soap. Complement the swirled soap with you favorites colors and fragrances for your own unique design!Ingredients Used: Crafter’s Choice® Premium Extra Clear MP Soap Base, Premium Ultra White MP Soap Base, Crafter's Choice® Azurite Sky Fragrance Oil, La Bomba Blue Mica Powder and Celestial Blue Mica Powder.
Step-by-Step Guide to Making Flavored and Tinted Lip Balms

Article

Step-by-Step Guide to Making Flavored and Tinted Lip Balms
This tutorial will show you how to add a little pizzazz to single colored lip balms. These can be customized to someone's favorite colors & flavors or as special shower and party favors. Spoons or butter knives for stirring Rubber gloves Glass measuring cups Toothpicks Microwave or electric mini melting pot Digital Scale Disposable pipettes .25 oz Round Lip Balm Tins Natural Lip Balm Base French Vanilla Lip Balm Flavoring Oil Rose Blush Lip Balm Tint Yellow Lip Balm Tint Lip Balm Sweetener (optional) Flavor Oil Guidelines:For lip balms, use up to 3% flavor oil. To calculate, multiply the product weight by 0.03 to get the required flavor oil weight. Start with 1% and increase as needed, since it's easier to add more than to reduce it.Flavor Oil Drop Conversion for 1 Ounce of Base: 6 drops = 1% 12 drops = 2% 18 drops = 3% Step 1: Measure the Lip Balm Base Place a glass container on your scale and tare it (zero out the scale). Measure 1 ounce of Natural Lip Balm Base. Step 2: Melt the Lip Balm Base Microwave the lip balm base in 30-second intervals until fully melted, stirring between each interval to avoid overheating. Typically, 2 rounds in the microwave are sufficient. Alternatively, use a Mini Melting Pot to melt the base. Step 3: Add Flavor OilUse a pipette to add French Vanilla Flavor Oil to the melted base. Start with 1% (6 drops) and gradually increase to 3% if desired.Optional Step: Add Sweetener Following the same process, add sweetener to the balm. You can use up to 3%, but start with 2% if you prefer. Stir until fully incorporated. If the sweetener is solid, warm the bottle in the microwave for 20 seconds or place it in a hot water bath to liquefy. Tip for Testing Flavor and Sweetness:Drop a small amount of the mixture onto your palm using a clean pipette. Once cooled, test it on your lips to see if more flavor or sweetener is needed. Do not exceed the recommended dosage.Step 5: Separate a Portion for SwirlsPour a small amount of the melted balm into a separate container. This portion will be colored a contrasting shade for creating swirls.Step 6: Tint the Main BatchAdd 2 drops of Yellow Lip Balm Tint to the original container and stir until fully incorporated. Set aside.Step 7: Tint the Separated PortionAdd 2 drops of Rose Blush Lip Balm Tint to the separated portion and stir until fully incorporated. Set aside.Step 9: Prepare for SwirlingLet the main balm set in the tin for about 1 minute. It should cool slightly but remain liquid for distinct swirls.Step 10: Add Contrasting TintUsing a clean pipette, drop small amounts of the Rose-tinted balm into the Yellow balm.Step 11: Create SwirlsUse a clean toothpick to swirl the red dots into the yellow balm, creating your desired patterns or designs.Step 12: Allow to HardenLet the balm cool and harden completely before moving it.Step 13: Final Cooling and StorageAllow the balm to cool fully before placing the lid on the tin to prevent condensation. Customize with different lip balm tints and flavors for fun variations! Perfecting Your Swirls: When creating a swirl lip balm, the key is to let the base cool just enough so it's still liquid but not too hot. This will allow the contrasting colors to sit on top without blending too much, giving you a defined swirl. Experiment with different tools, such as toothpicks, skewers, or even fine brushes, to achieve various patterns and effects in your diy swirled lip balm.Experiment with Color Combinations: Don't be afraid to play with color when making swirled lip balm. Try combining complementary or contrasting colors to create visually striking designs. If you're unsure about a combination, test a small amount first. You can also layer multiple colors by repeating the swirling process with additional tints for a more intricate design. Remember, the more unique the color blend, the more eye-catching your swirled lip balm will be. How do I prevent the colors from blending too much when making swirl lip balm?To keep the colors from blending too much in your swirl lip balm, let the base cool slightly before adding the second color. The base should be thick enough to support the new color without allowing it to sink in completely. This will help maintain distinct swirls rather than creating a single blended color.What's the best tool for creating swirls in diy swirled lip balm?A clean toothpick is commonly used for creating swirls in diy swirled lip balm. However, you can also use skewers, fine-tipped brushes, or even a small spatula to achieve different swirl effects. The tool you choose will depend on the type of swirl pattern you're aiming for.Can I use any lip balm tints for making swirled lip balm?Yes, you can use any lip balm tints for making swirled lip balm, as long as they are designed for cosmetic use and safe for lips. Be sure to mix the tints thoroughly into the base to prevent any streaks or uneven color. Feel free to experiment with different shades to create a swirl lip balm that's as unique as you are!
Revamp Your Skincare Routine: DIY Soap and Lotion for Personalized Care

Article

Revamp Your Skincare Routine: DIY Soap and Lotion for Personalized Care
Creating homemade skincare products allows you to customize your routine to fit your specific skin needs. Whether you're looking to soothe, exfoliate, or brighten your skin, DIY skincare offers the flexibility to choose the best ingredients. This blog will explore fantastic DIY skincare ideas that can revamp your routine and give you the personalized care your skin deserves. These homemade skin care recipes, from gentle exfoliating scrubs to nourishing face masks, will help you achieve healthier, glowing skin. Building a DIY skincare routine involves choosing the right products and ingredients for your skin type. Whether you have dry, oily, sensitive, or combination skin, you can tailor each step of your routine to meet your specific needs. A basic DIY skin care routine should include cleansing, exfoliating, moisturizing, and masking. By using natural ingredients and homemade products, you can avoid harsh chemicals and give your skin the nourishment it needs.Here’s a simple guide to creating a DIY skincare routine: Cleanser: Start with a gentle, homemade cleanser that suits your skin type. Exfoliating Scrub: Use a DIY exfoliating scrub to remove dead skin cells and reveal a fresh complexion. Moisturizer: Apply a homemade lotion or cream to lock in moisture and hydrate your skin. Face Mask: To address specific skin concerns, incorporate a nourishing face mask, such as an oatmeal or turmeric and yogurt mask. Exfoliation is key to a glowing complexion, as it helps remove dead skin cells and unclog pores. Making your own exfoliating scrub allows you to choose gentle, natural ingredients that won’t irritate your skin.DIY Exfoliating Scrub Ingredients: Brown Sugar: 1/2 cup (A natural exfoliant that helps remove dead skin cells without being too harsh.) Coconut Oil: 1/4 cup (Provides deep hydration and helps to soften the skin.) Honey: 1 tablespoon (A natural humectant that moisturizes and soothes the skin.) Lemon Juice: 1 tablespoon (Adds a brightening effect and helps to even out skin tone.) Lavender Essential Oil: 5-7 drops (Adds a soothing scent and has calming properties.) Instructions: In a mixing bowl, combine the brown sugar and coconut oil. Add the honey and lemon juice, stirring until fully mixed. Finally, add the lavender essential oil and mix again. Store the scrub in a jar and use 1-2 times per week for soft, glowing skin. Oatmeal is known for its soothing properties, making it an excellent ingredient for calming irritated or sensitive skin. This DIY oatmeal mask is perfect for nourishing and hydrating their skin while reducing redness and inflammation.Oatmeal Mask Ingredients: Oats (Finely Ground): 2 tablespoons (Soothes and calms irritated skin.) Plain Yogurt: 1 tablespoon (Moisturizes and gently exfoliates the skin.) Honey: 1 tablespoon (Hydrates and acts as a natural antibacterial agent.) Chamomile Essential Oil: 3-5 drops (soothing and calming skin, reducing redness.) Instructions: Finely grind the oats in a food processor or blender. In a small bowl, mix the ground oats with yogurt and honey. Add the chamomile essential oil and stir well. Apply the mask to your face and leave it on for 15-20 minutes before rinsing off with warm water. Turmeric is a powerful ingredient known for its anti-inflammatory and brightening properties. Combined with yogurt, it creates a mask that can help reduce redness, brighten your complexion, and even out skin tone. This DIY skincare product is perfect for those looking to add a little glow to their routine.Turmeric & Yogurt Mask Ingredients: Turmeric Powder: 1 teaspoon (Reduces inflammation and brightens the skin.) Plain Yogurt: 2 tablespoons (Hydrates and soothes the skin while providing gentle exfoliation.) Honey: 1 teaspoon (Moisturizes and has antibacterial properties.) Rosehip Oil: 5 drops (Rich in antioxidants, helps to nourish and repair the skin.) Instructions: In a small bowl, mix the turmeric powder with plain yogurt. Add the honey and rosehip oil, stirring until the ingredients are well combined. Apply the mask evenly to your face and let it sit for 10-15 minutes. Rinse off with warm water and pat your face dry. By incorporating these homemade skincare recipes into your routine, you can enjoy the benefits of natural ingredients while tailoring your skincare to your unique needs. Whether you're making an exfoliating scrub, an oatmeal mask, or a turmeric & yogurt mask, these DIY skincare products offer a simple and effective way to revamp your skincare routine for healthier, glowing skin.